
💡この記事でわかること
・Atlas製pHセンサーの使い方(Pythonコード例あり)
・接続方法と注意点
・精度や実用性のレビュー
・他センサーとの違い
Atlas Scientific pH Kitを使用し、pythonによりpHを取得します。
水耕栽培やアクアリウムをやってるとやっぱり数値化したくなるのがpH。
ラズパイから使用できるセンサーが私にはAtlas Scientific製のものしか見つけられず、英語のみのマニュアルを四苦八苦しながらpHが取得できるようになりましたので、皆様のお役に少しでも役に立てばと備忘メモです。
使ったpHセンサーと必要なもの
| アイテム | 説明 | 購入リンク |
|---|---|---|
| Atlas Scientific pHセンサー | 高精度なpH測定が可能なセンサー | amazon |
| BNC接続ボード | pHセンサーとRaspberry Piをつなぐための中継基板 | |
| Raspberry Pi(本体) | 実行用マイコン(例:Pi 3B+, 4, 5など) | |
| ジャンパワイヤ | センサーとRaspberry Piを接続する配線 | |
| ブレッドボード | 配線のテストや実験用に | |
| 電源(モバイルバッテリー or アダプター) | 安定動作のために |
事前準備
アップデート
# sudo apt-get update
# sudo apt-get upgrade
# sudo apt-get dist-upgrade
Atlas Scientific pH Kit
Atlas Scientific pH Kit準備
以下のAtlas Scientificのサイトから購入しました。
英語がわからなくても、chromeの翻訳機能を駆使すれば購入は簡単です!
amazon Payが利用できるので、決済はamazonで行いました。
なんと!楽天で購入できるようになっていました。時代を感じます。
![[商品価格に関しましては、リンクが作成された時点と現時点で情報が変更されている場合がございます。]](https://hbb.afl.rakuten.co.jp/hgb/3c58d6b5.5f4983cc.3c58d6b6.030bb4dd/?me_id=1344564&item_id=10004665&pc=https%3A%2F%2Fimage.rakuten.co.jp%2Frobotshopjapan%2Fcabinet%2Fproduct_images%2Fatl%2Frbatl02_7.jpg%3F_ex%3D240x240&s=240x240&t=picttext "[商品価格に関しましては、リンクが作成された時点と現時点で情報が変更されている場合がございます。]")

届いた箱を開封します。
海を超えてやってきたセンサー達。
テンション上がる。
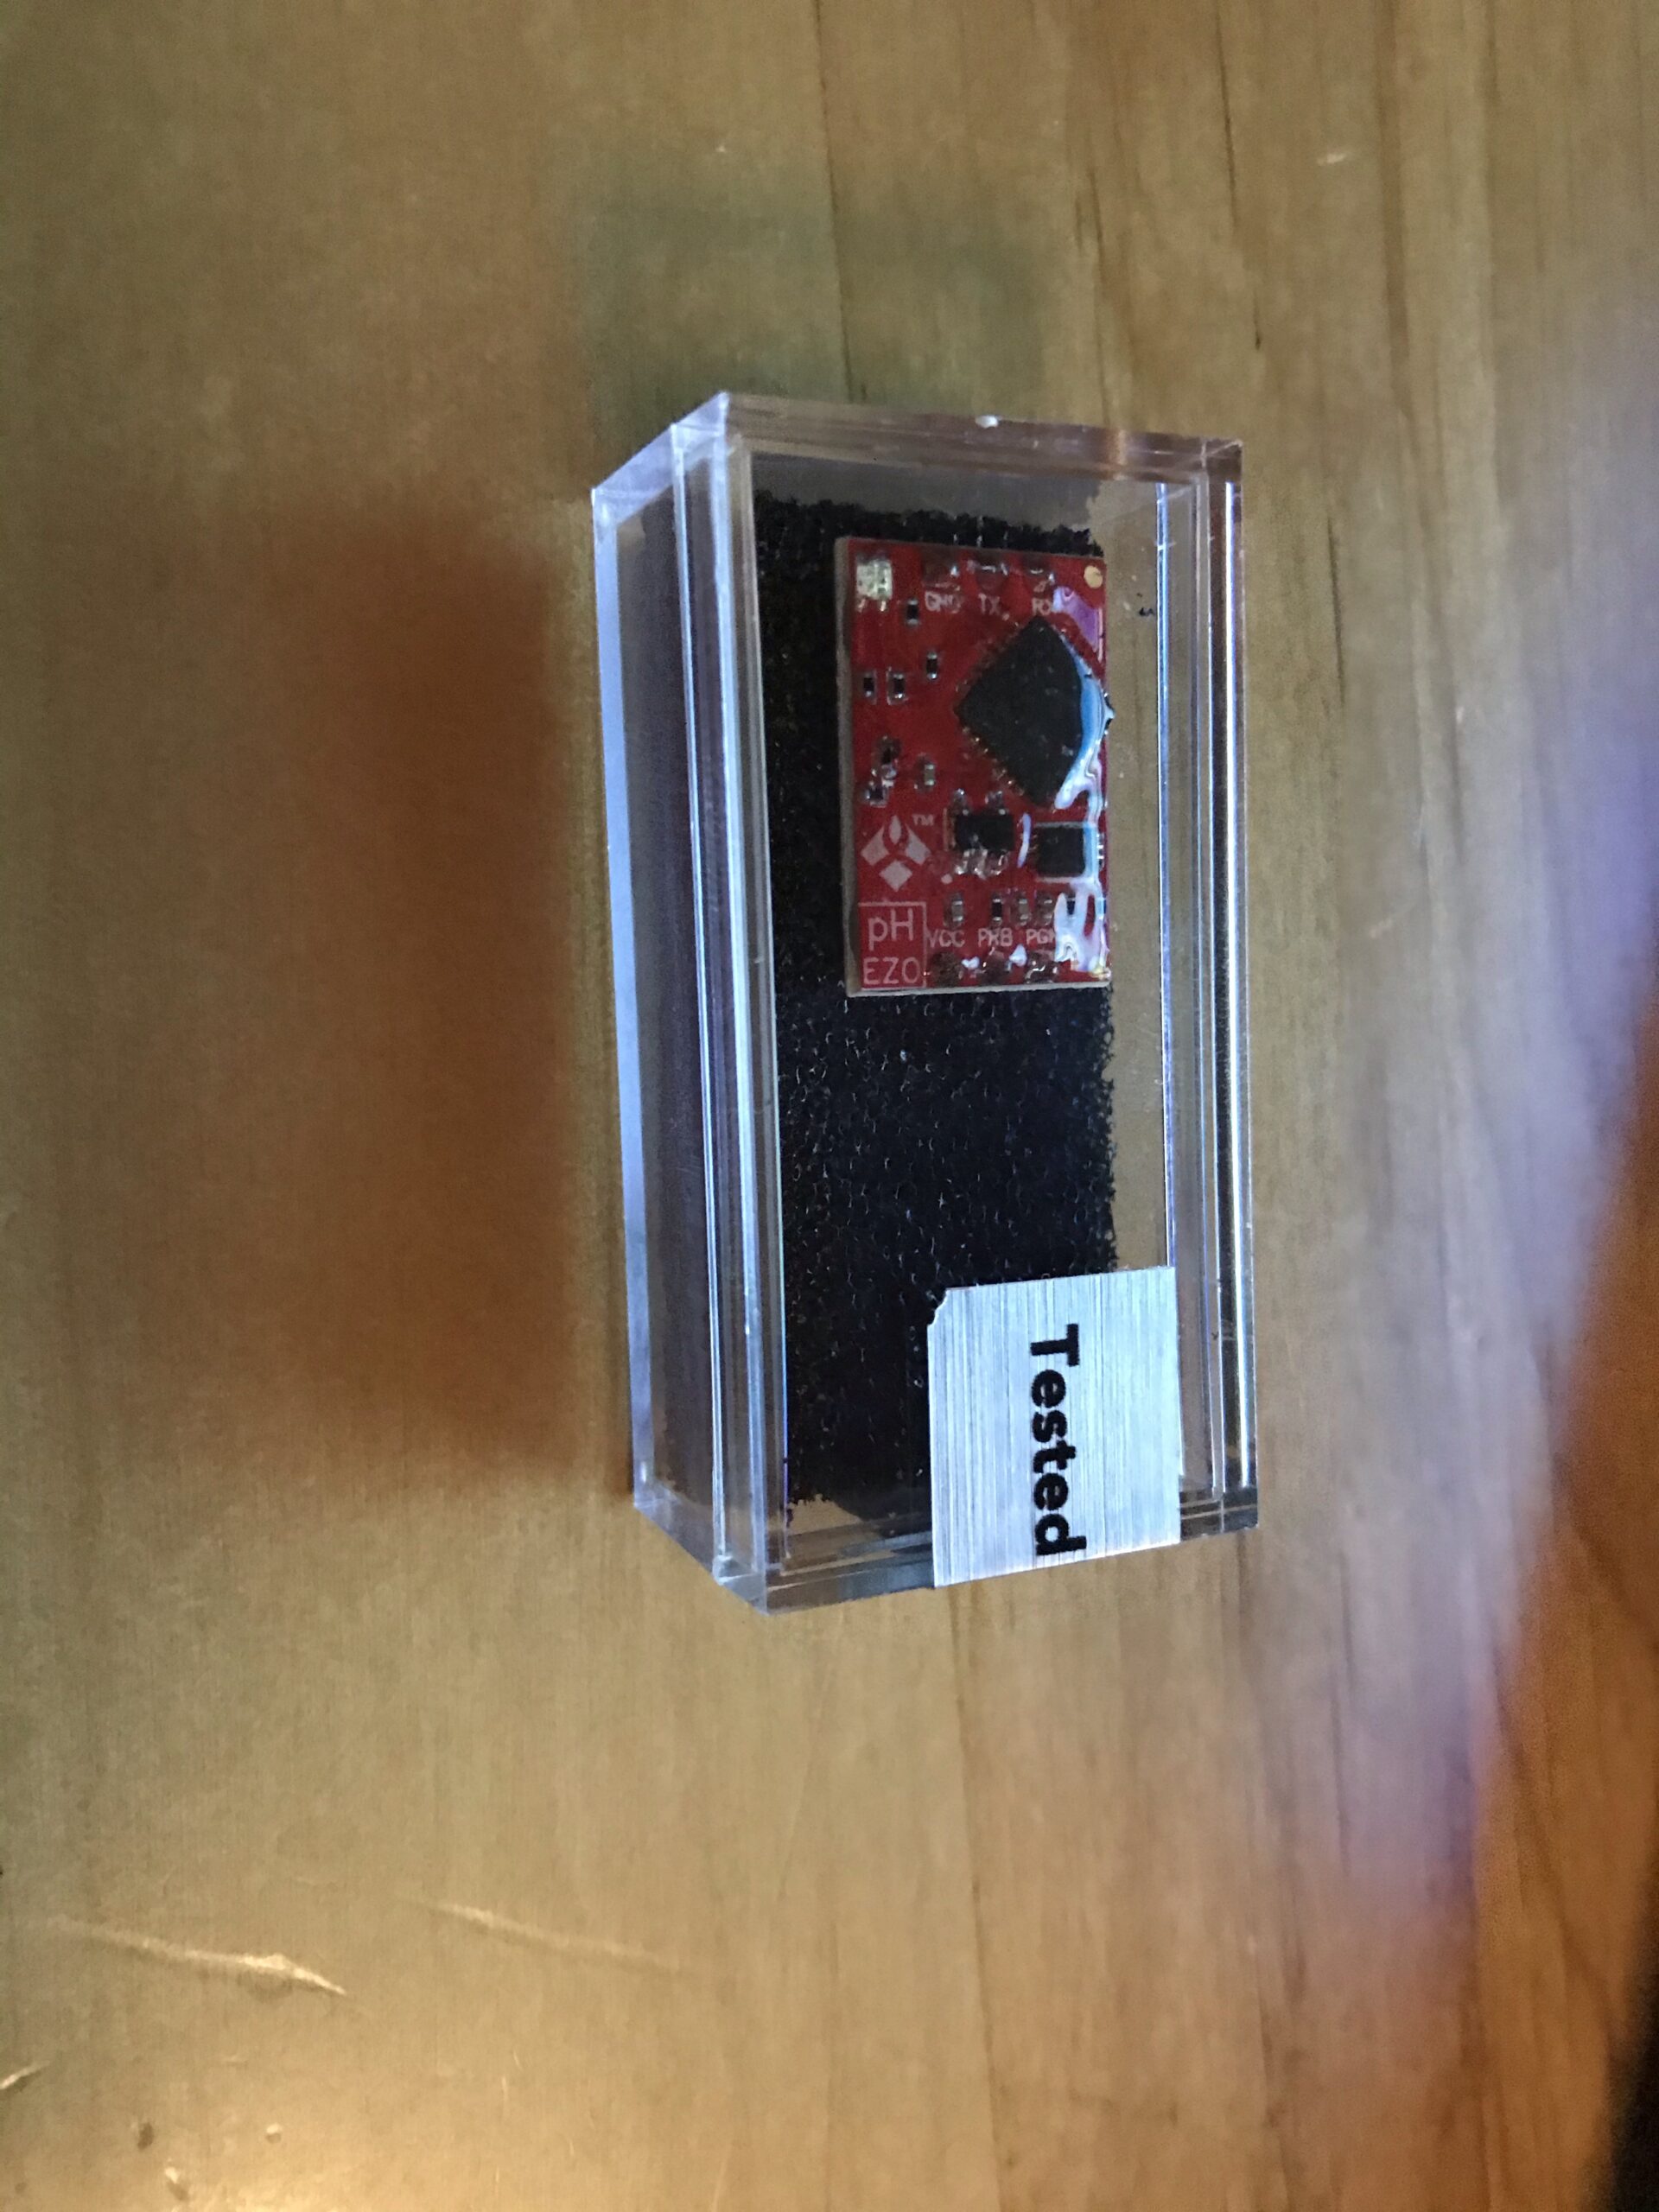
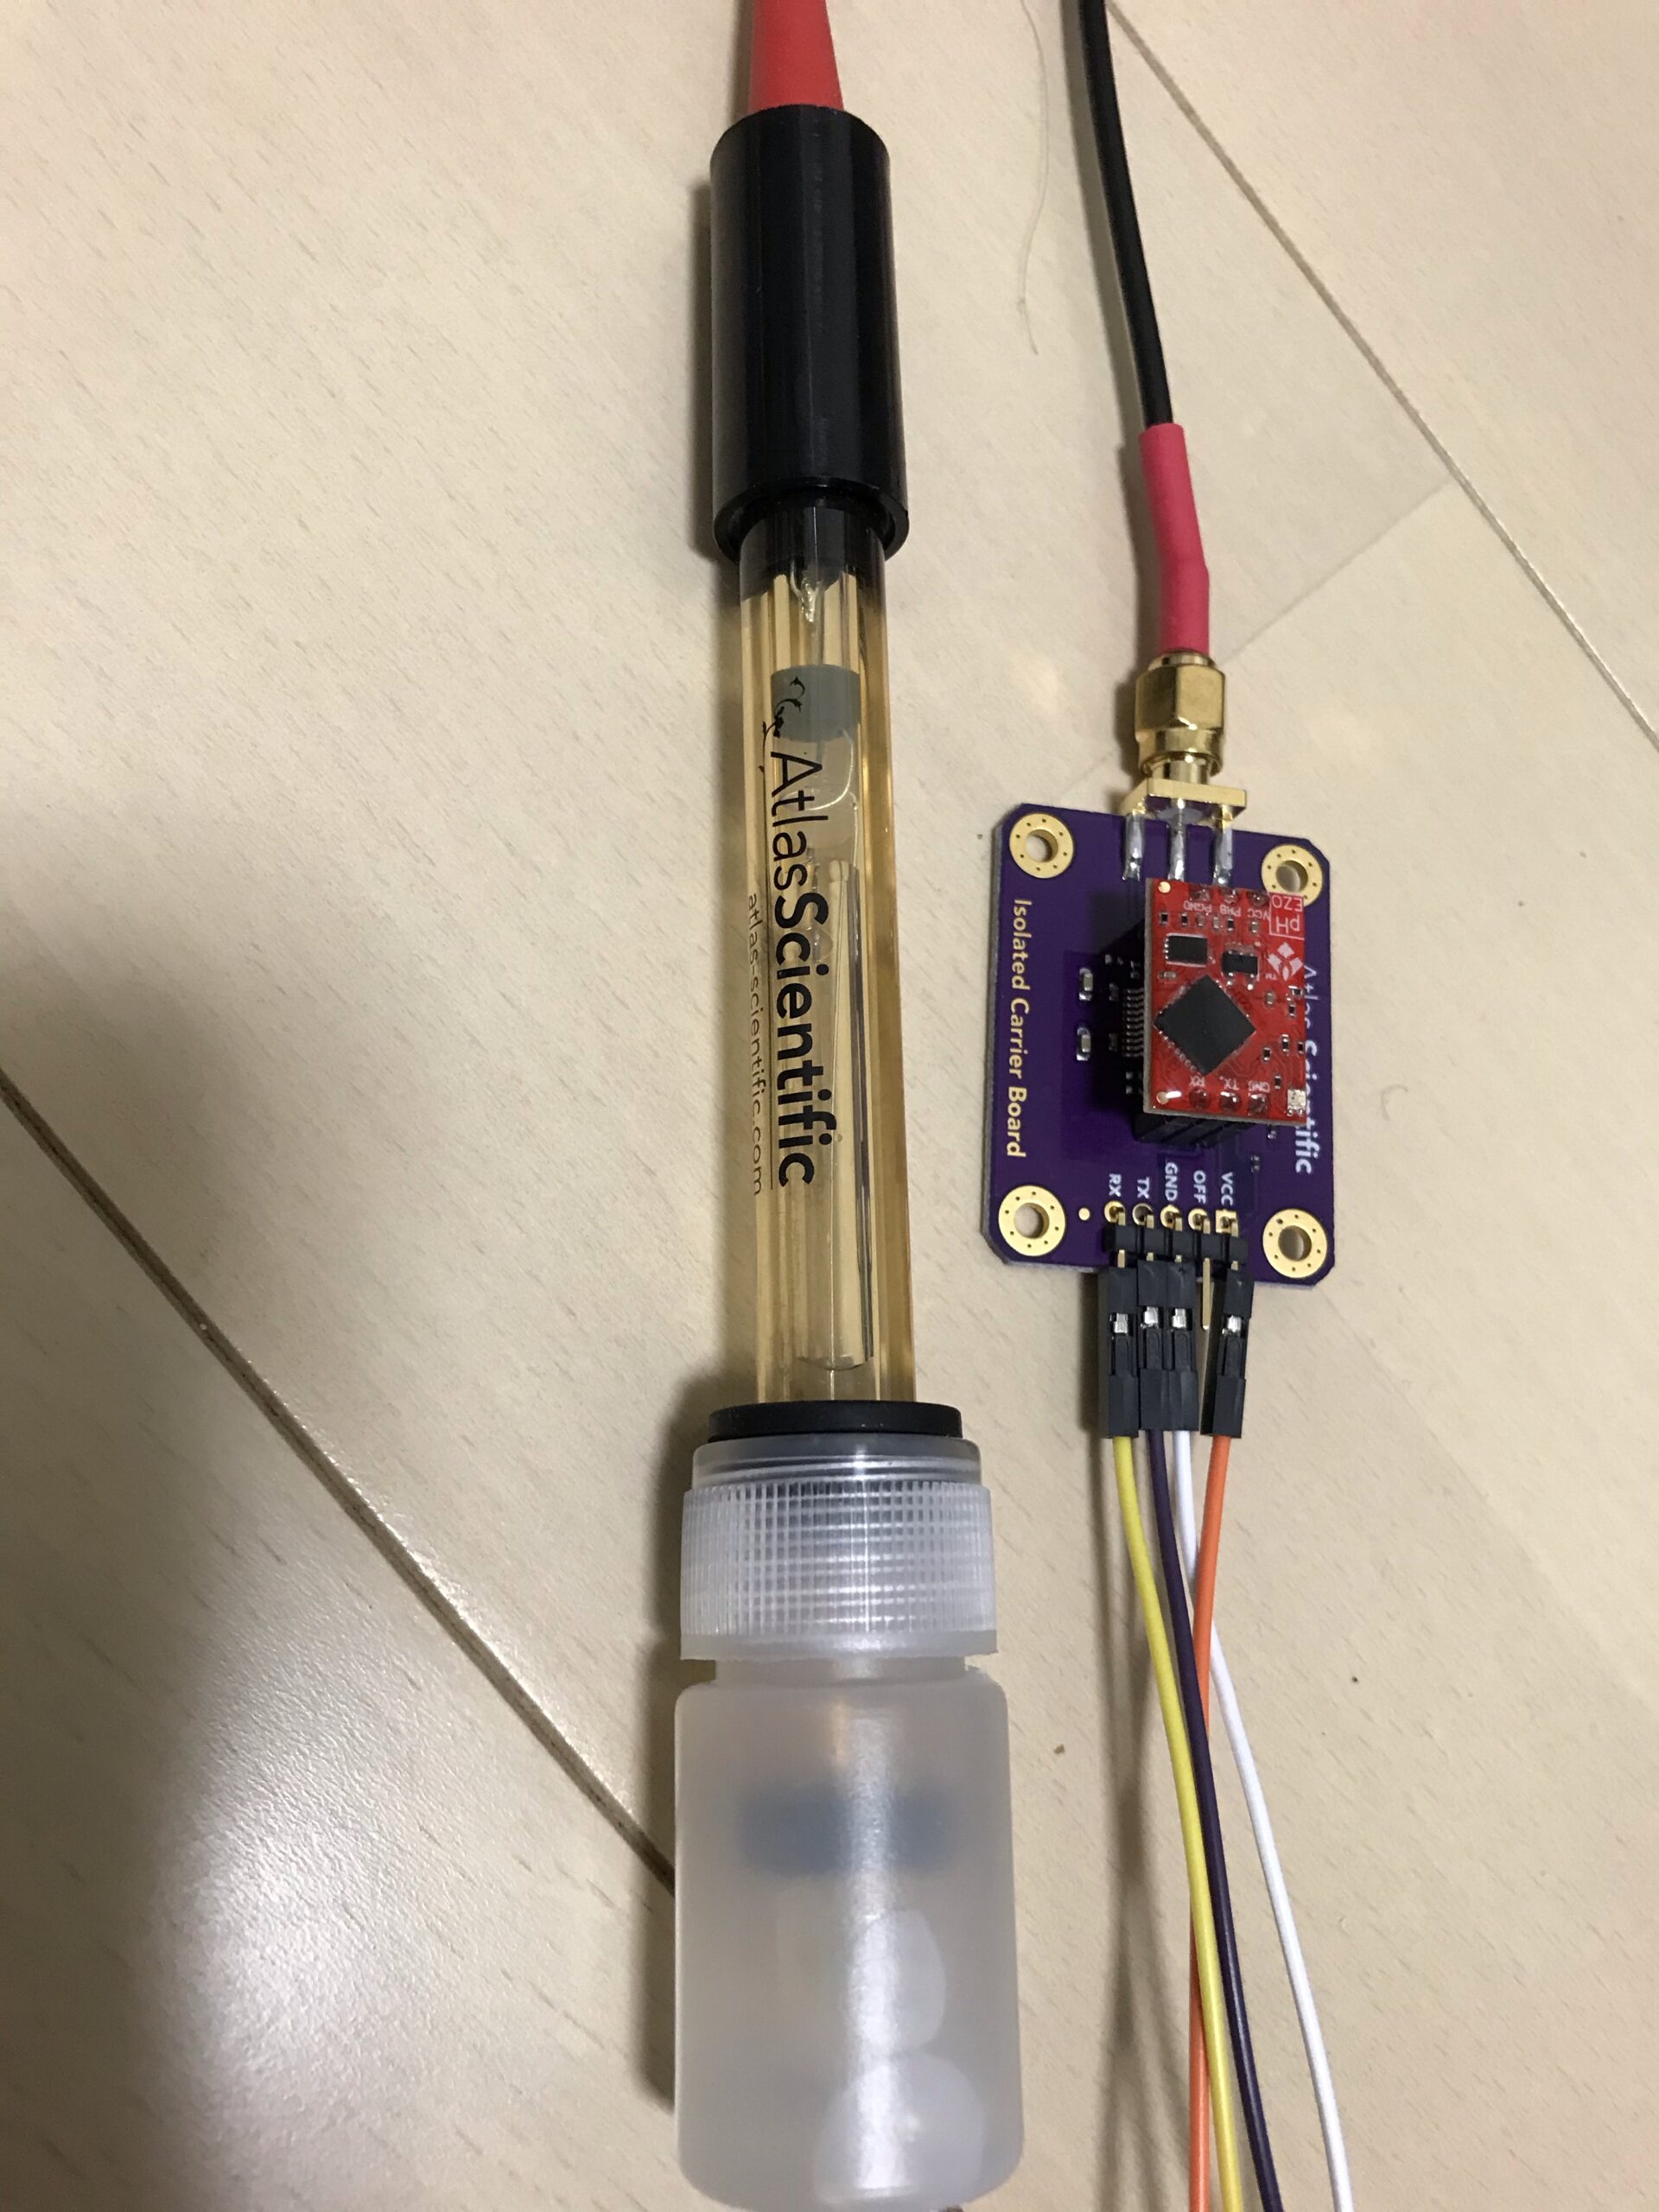
開封後のセットはこんな感じです。
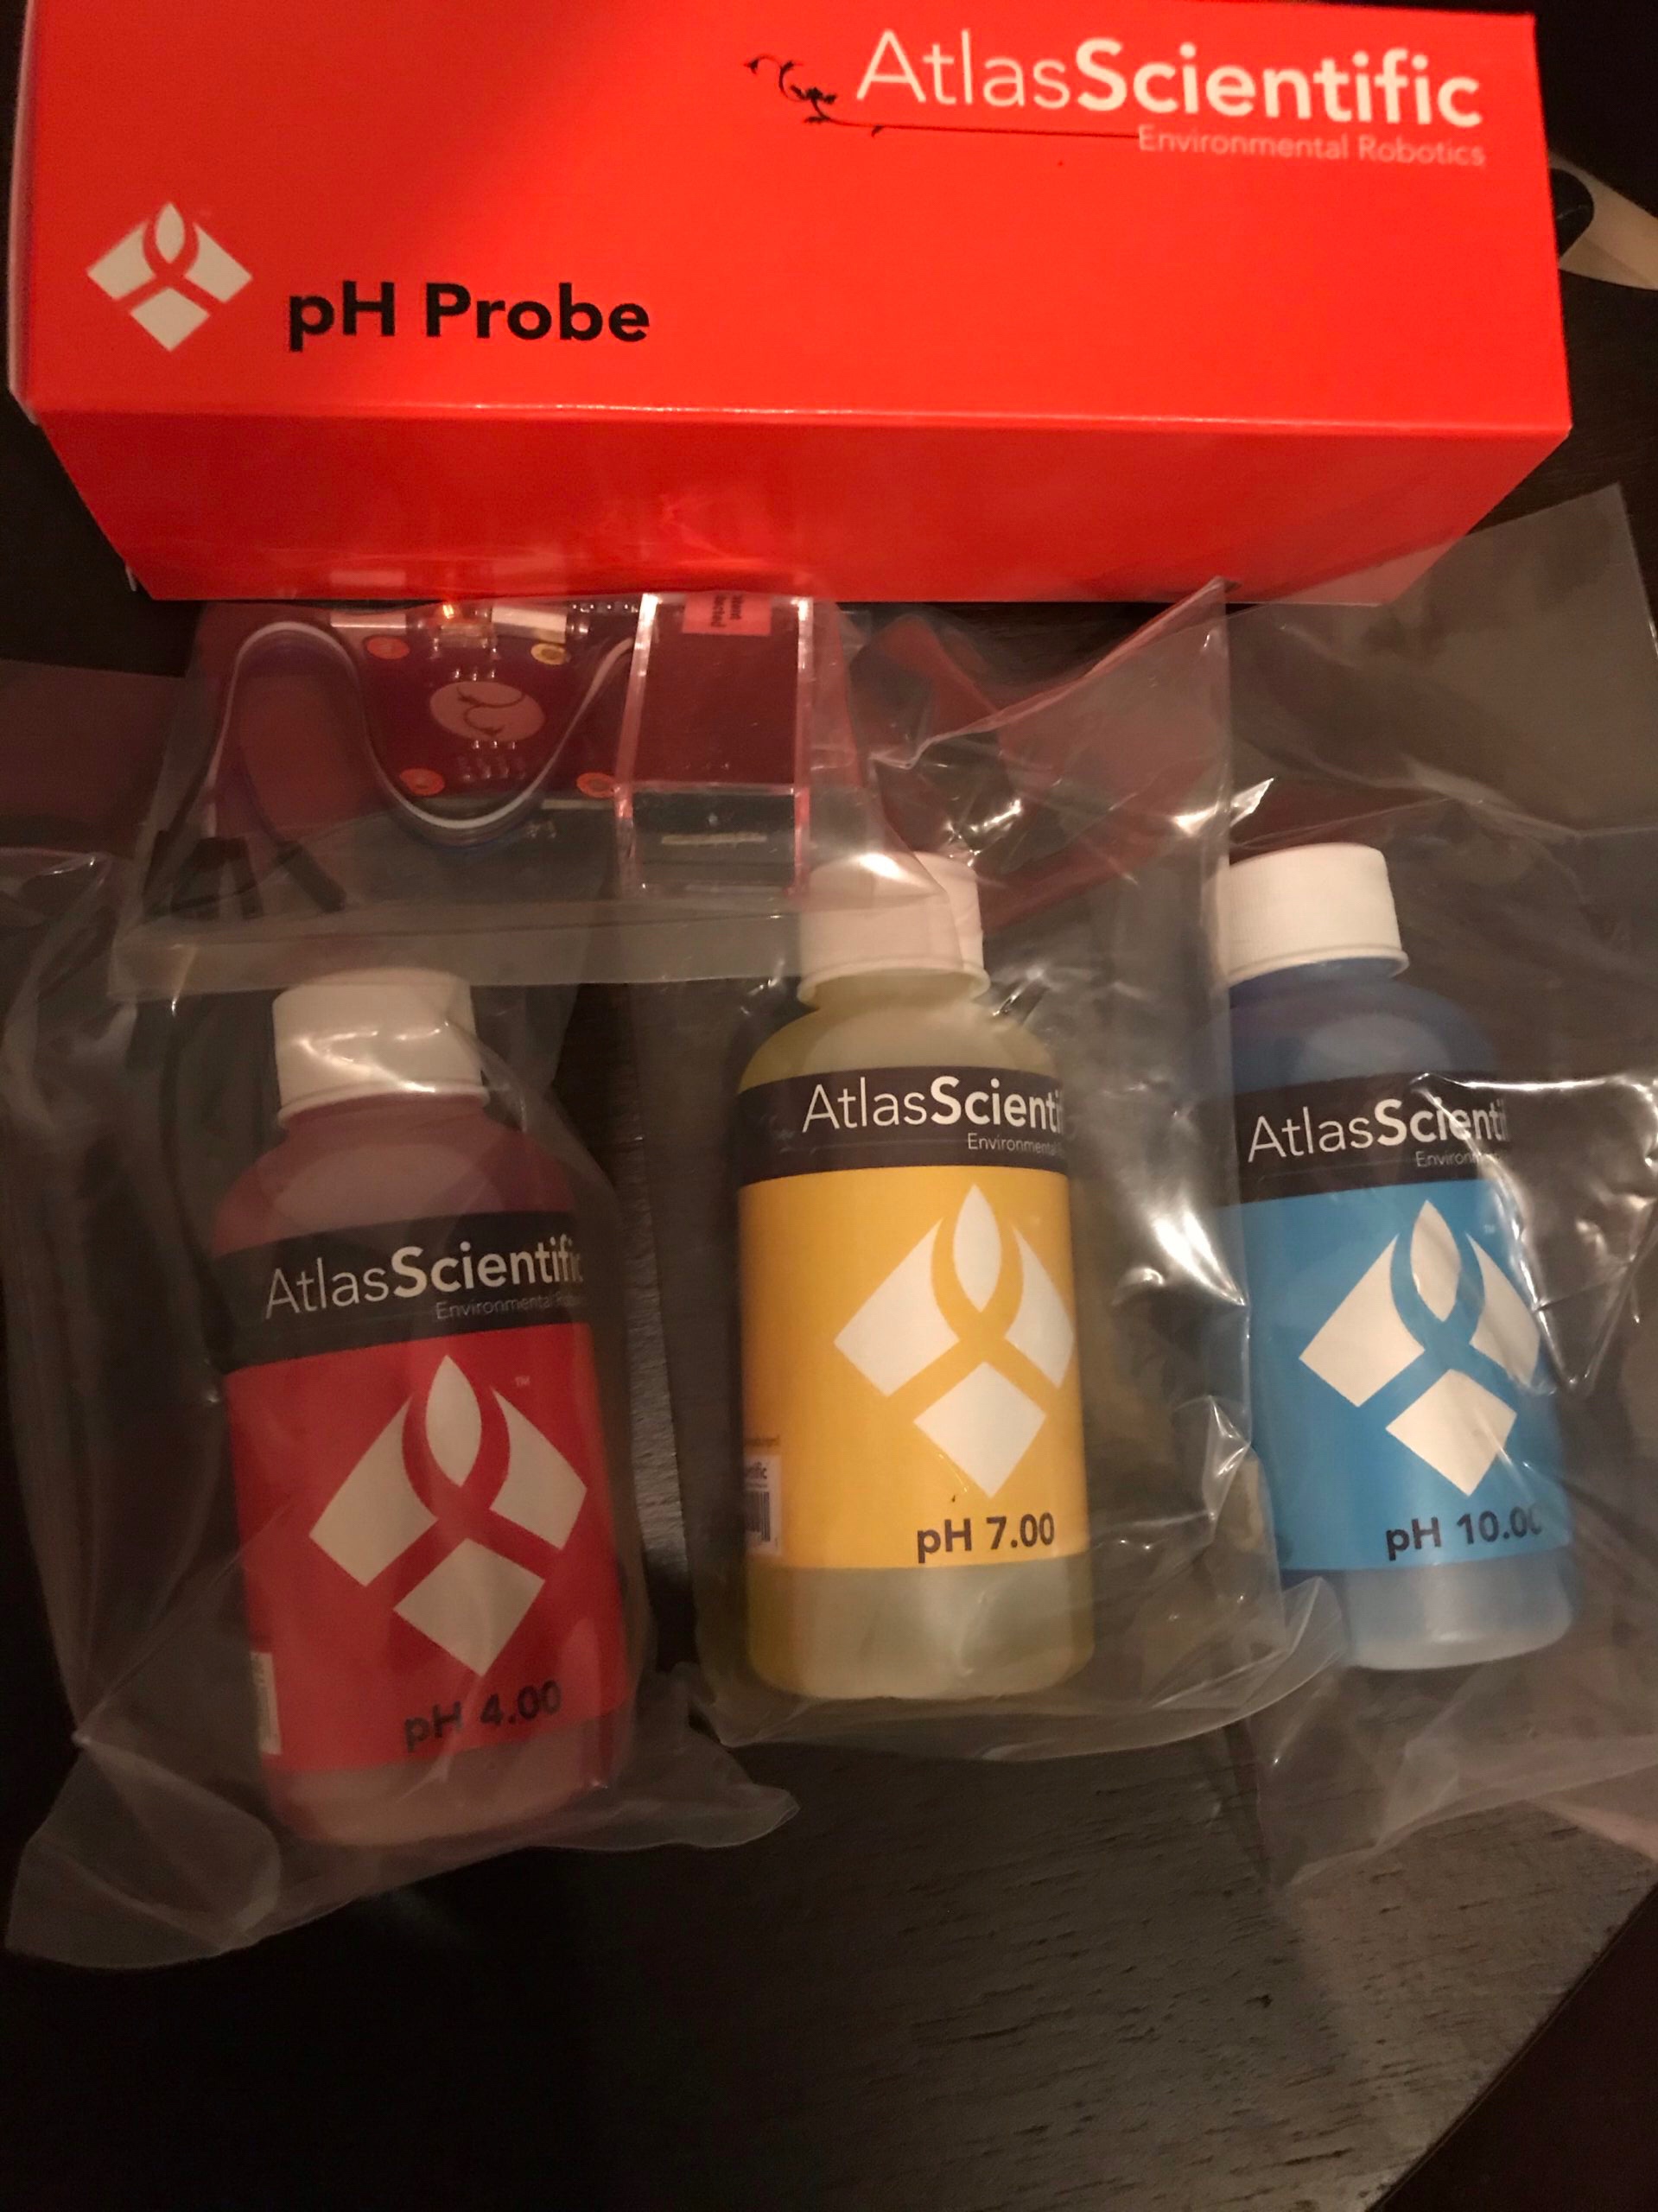
計測用のプローブや接続用キット、キャリブレーション用の溶液が入ってます。
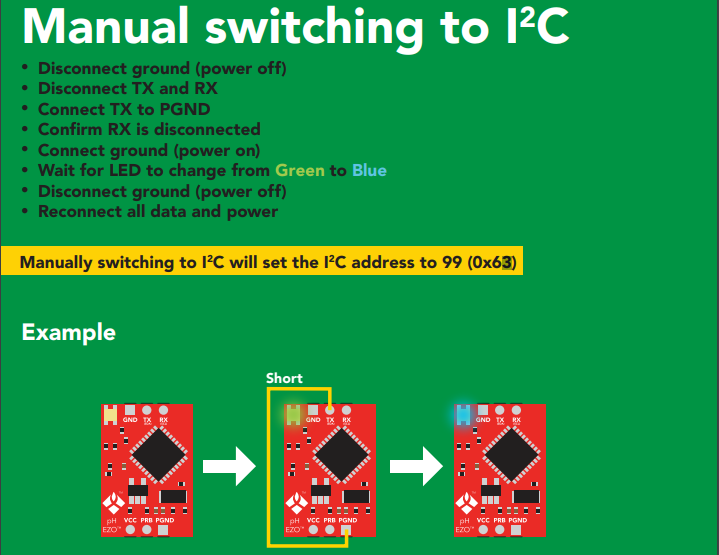
pH Kit モード変更(UART→I2C)
デフォルトだと接続モードはUARTとなるため、I2Cに変更します。
変更方法はセンサーをUARTモードのままラズパイに接続し、TXとPGNDをshortさせます。
そのため、初期結線は以下となります。
| ラズパイ | pHセンサー |
| Pin2 or Pin4(5V) | VCC |
| Pin6(GND) | GND |
| Pin10(GPIO15、RXD0) | RX |
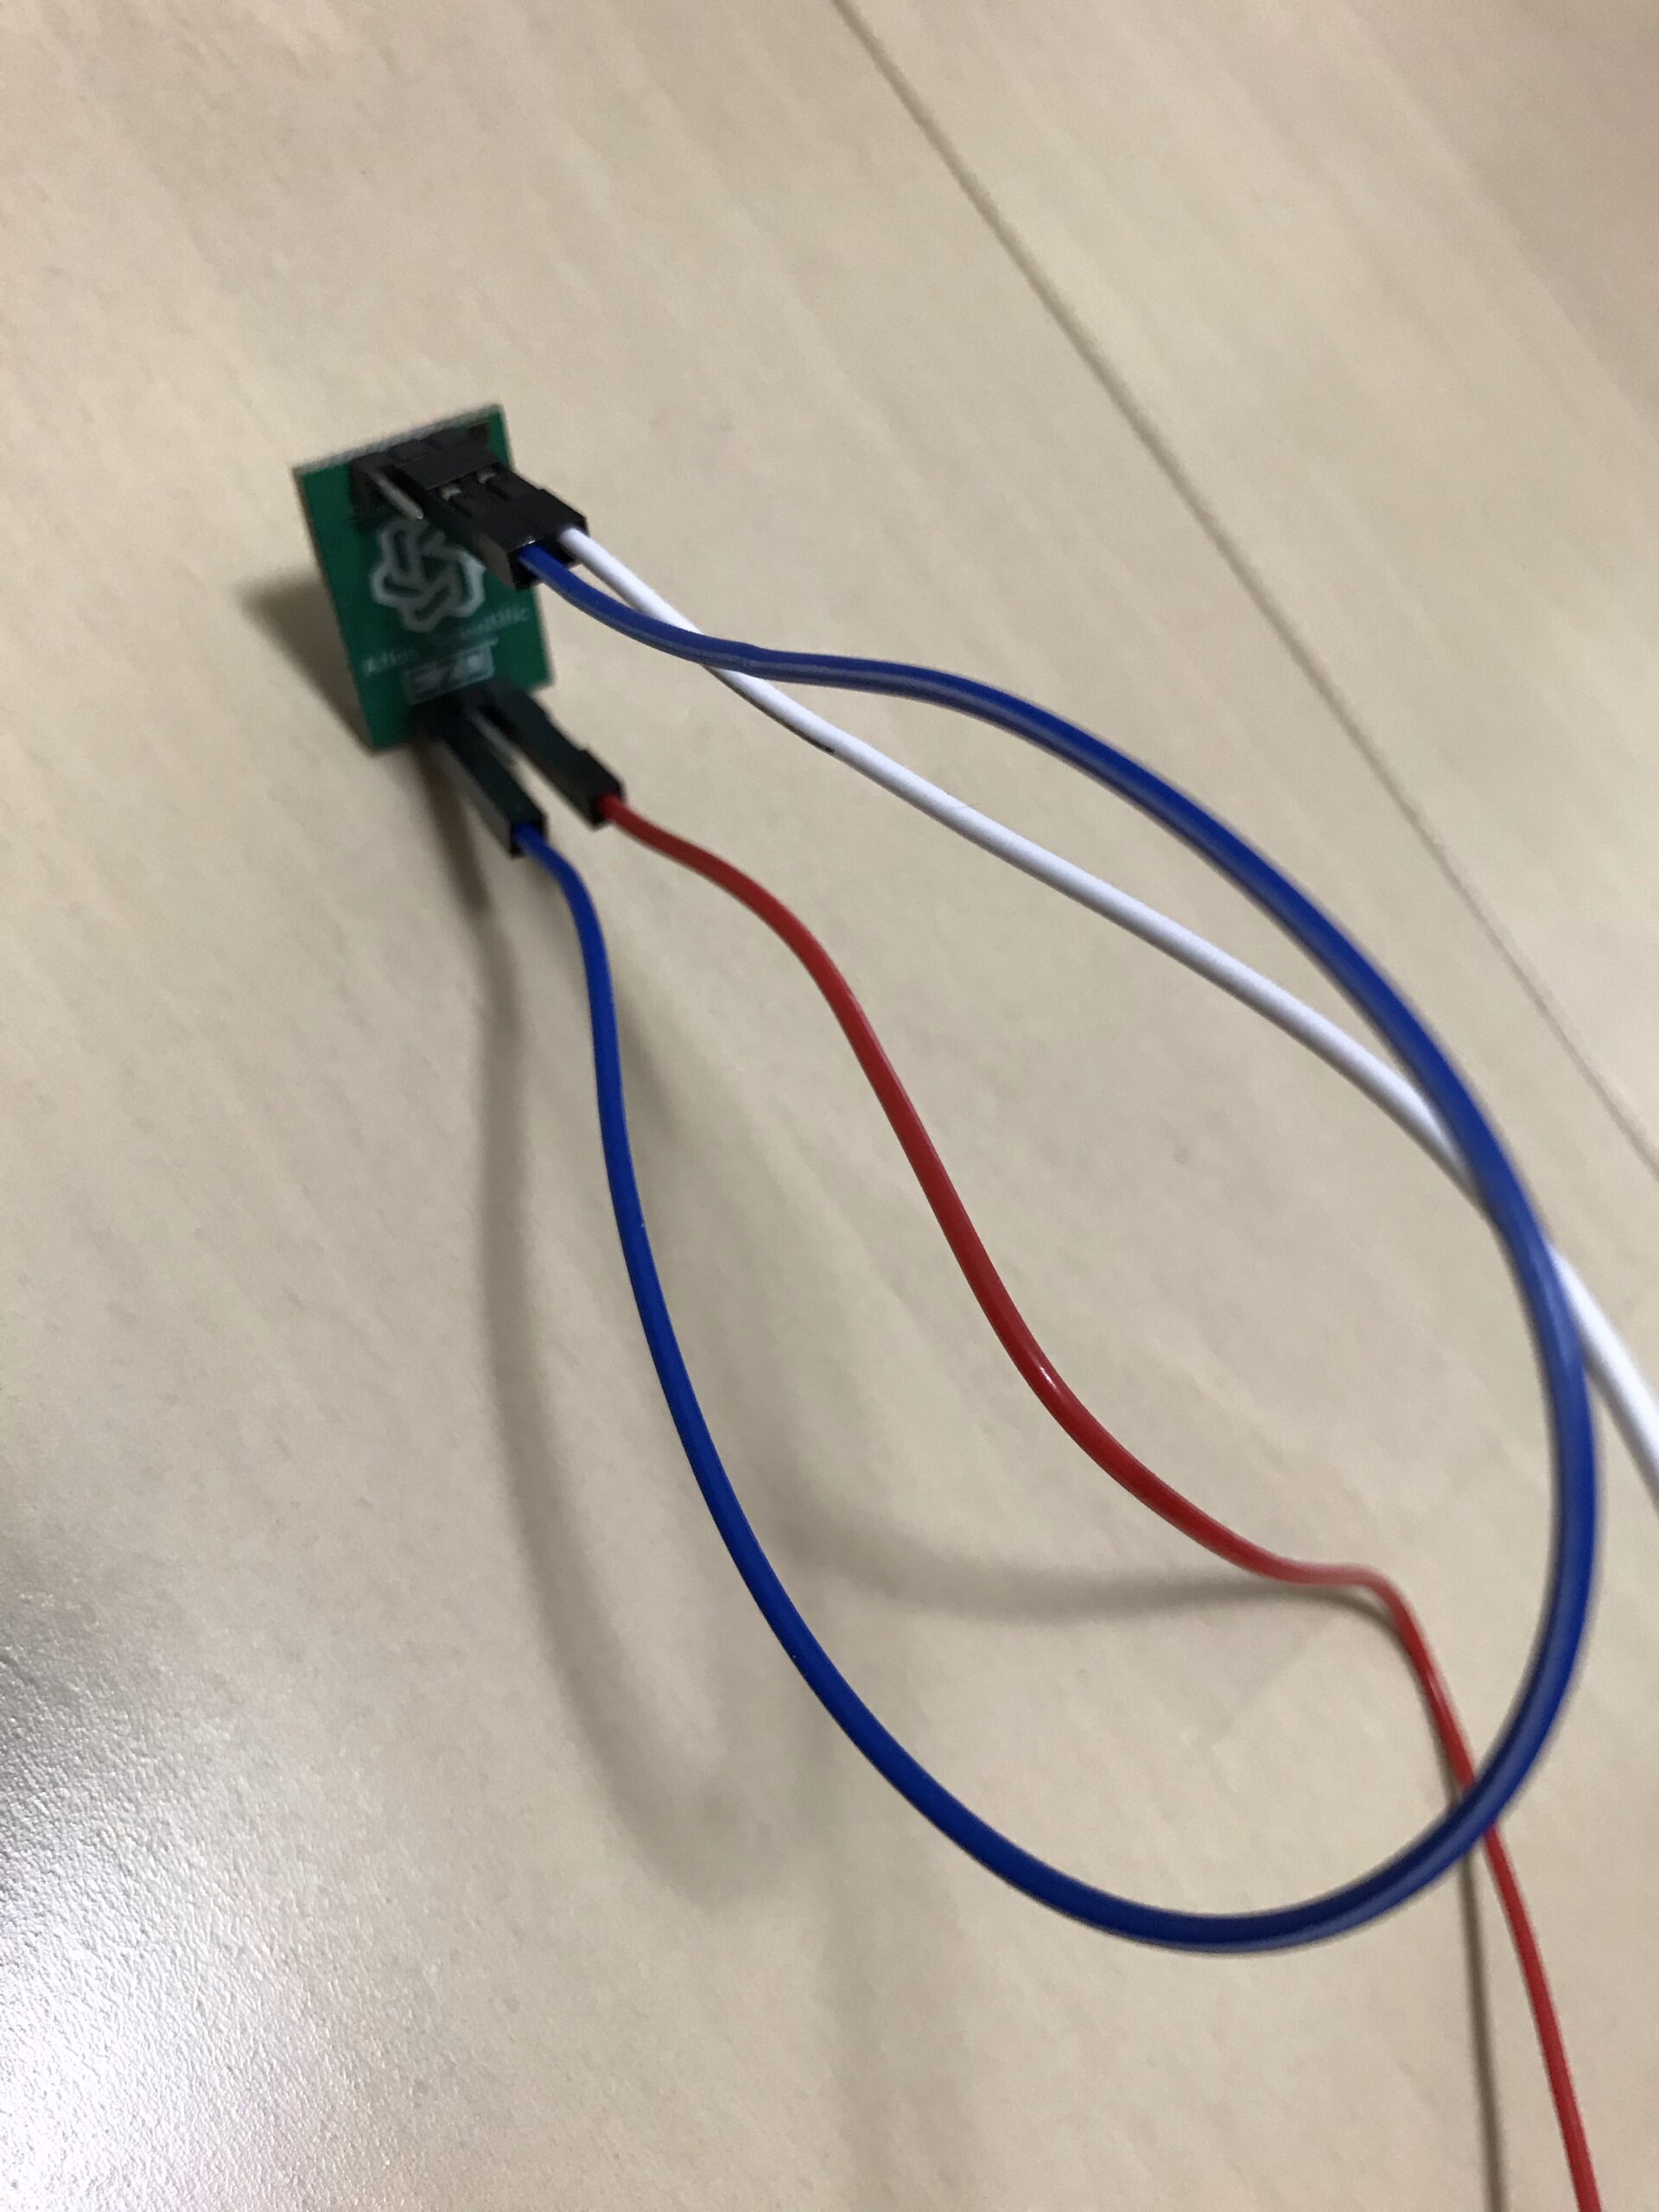
※RX接続してません!本当はRXの接続が必要です。
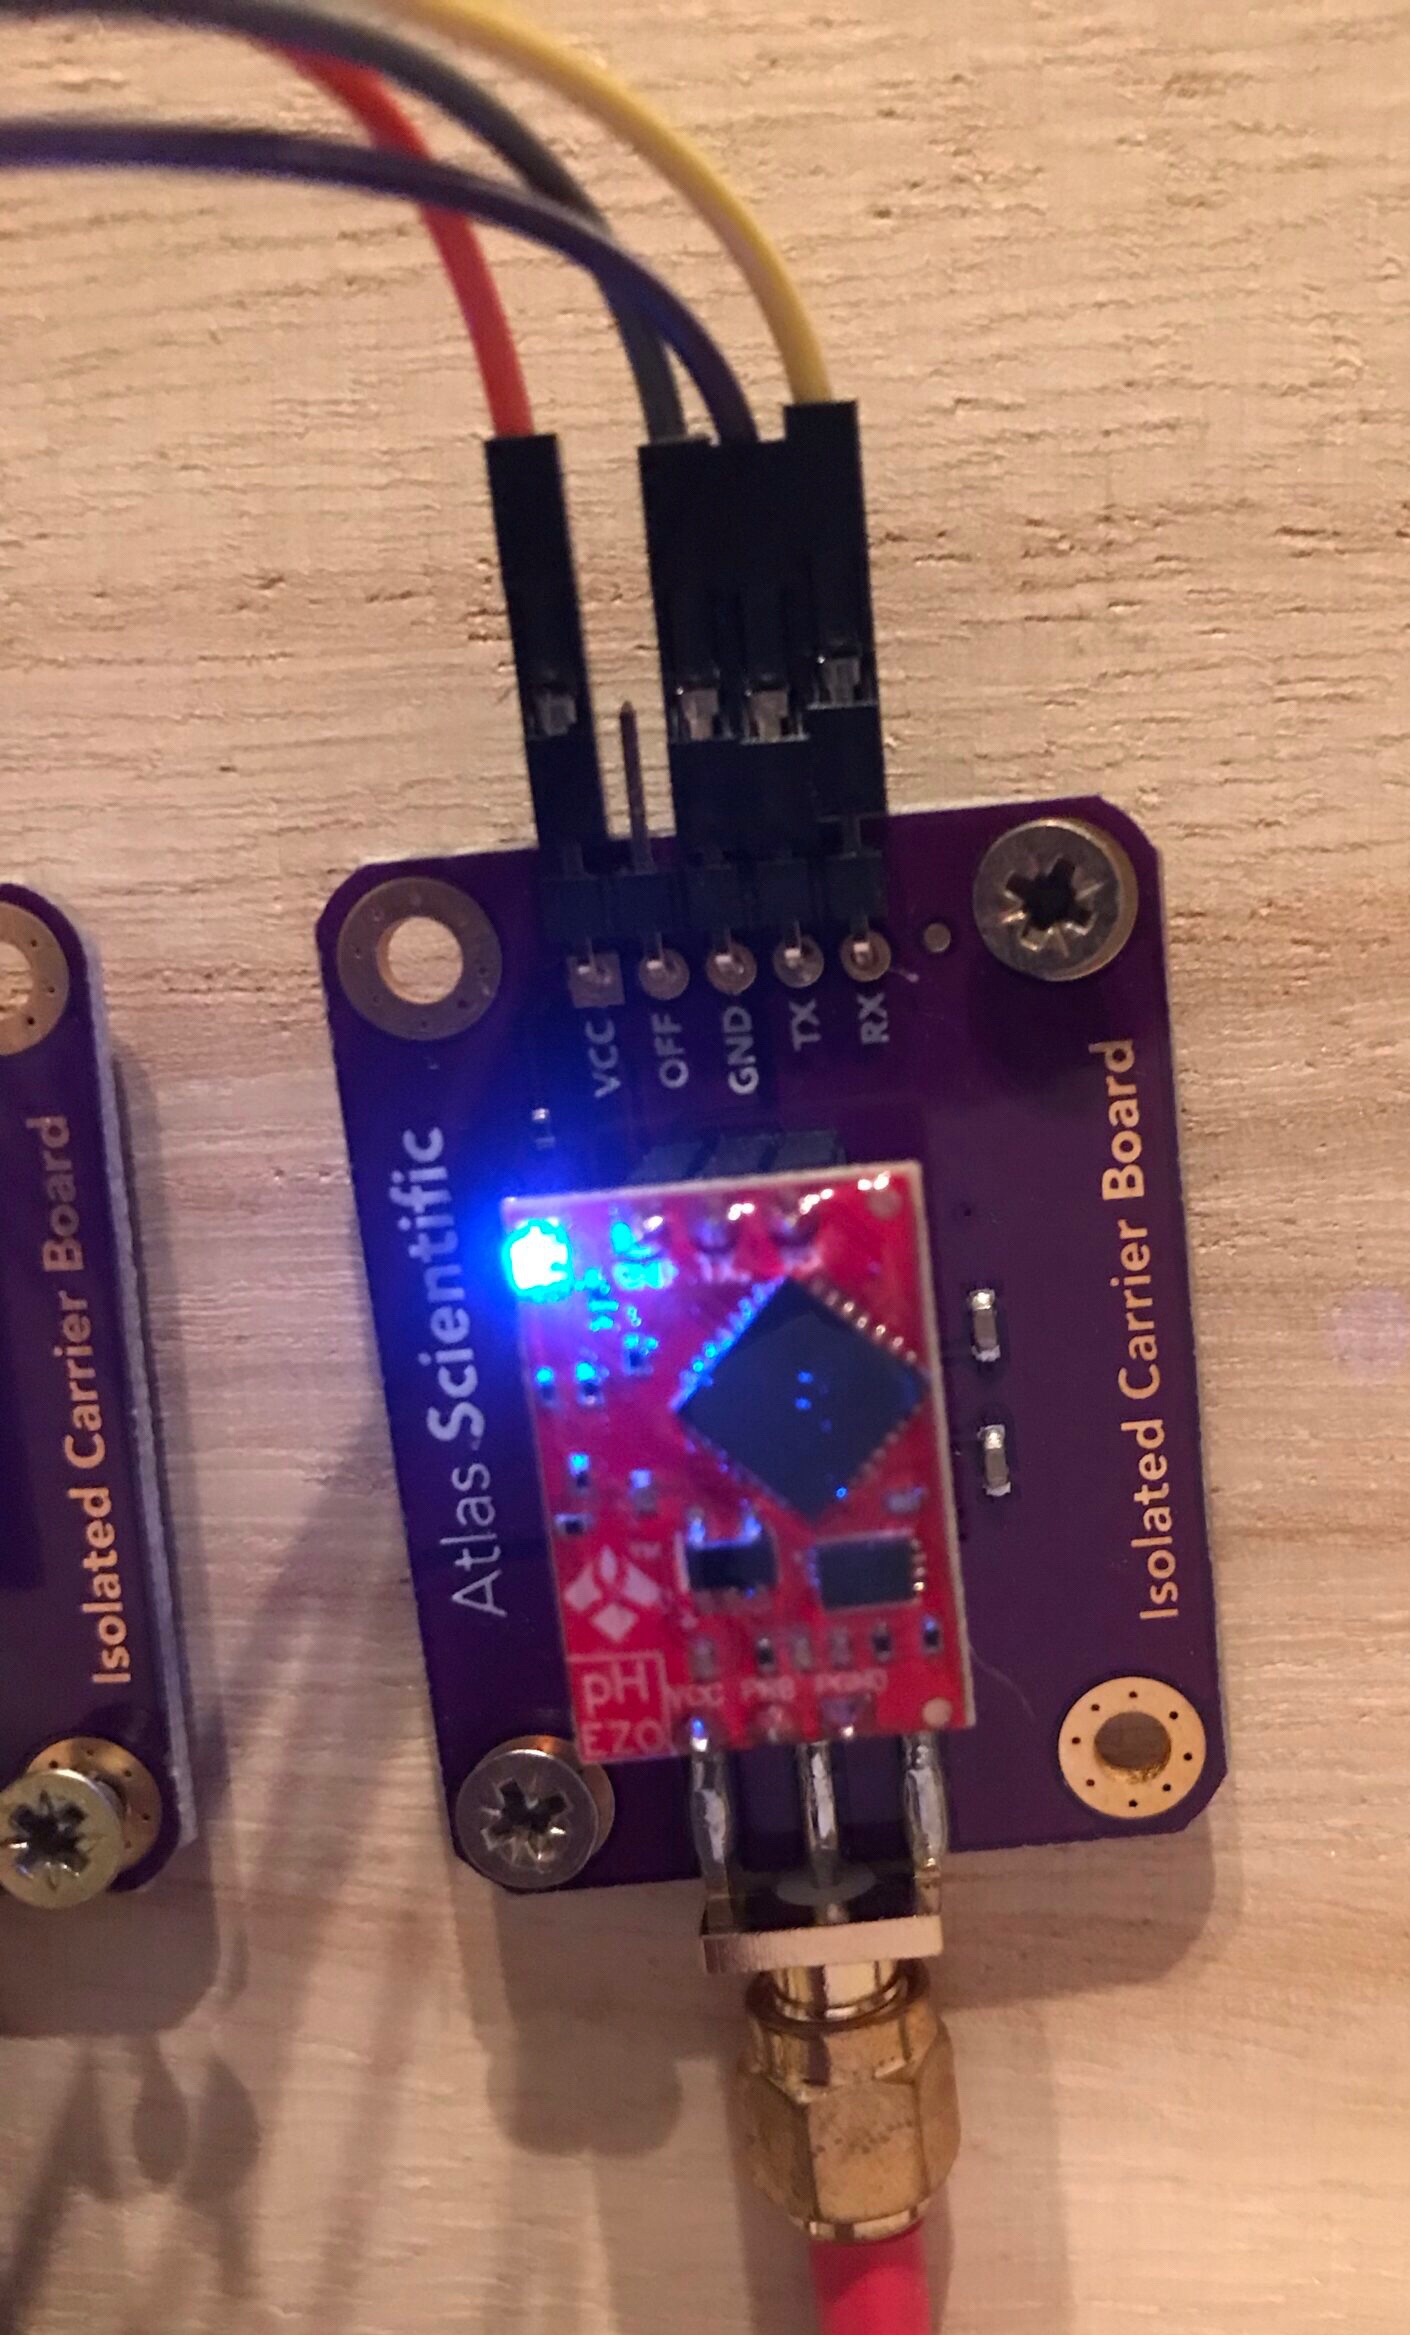
以上でI2Cへのモード変更が完了しました。
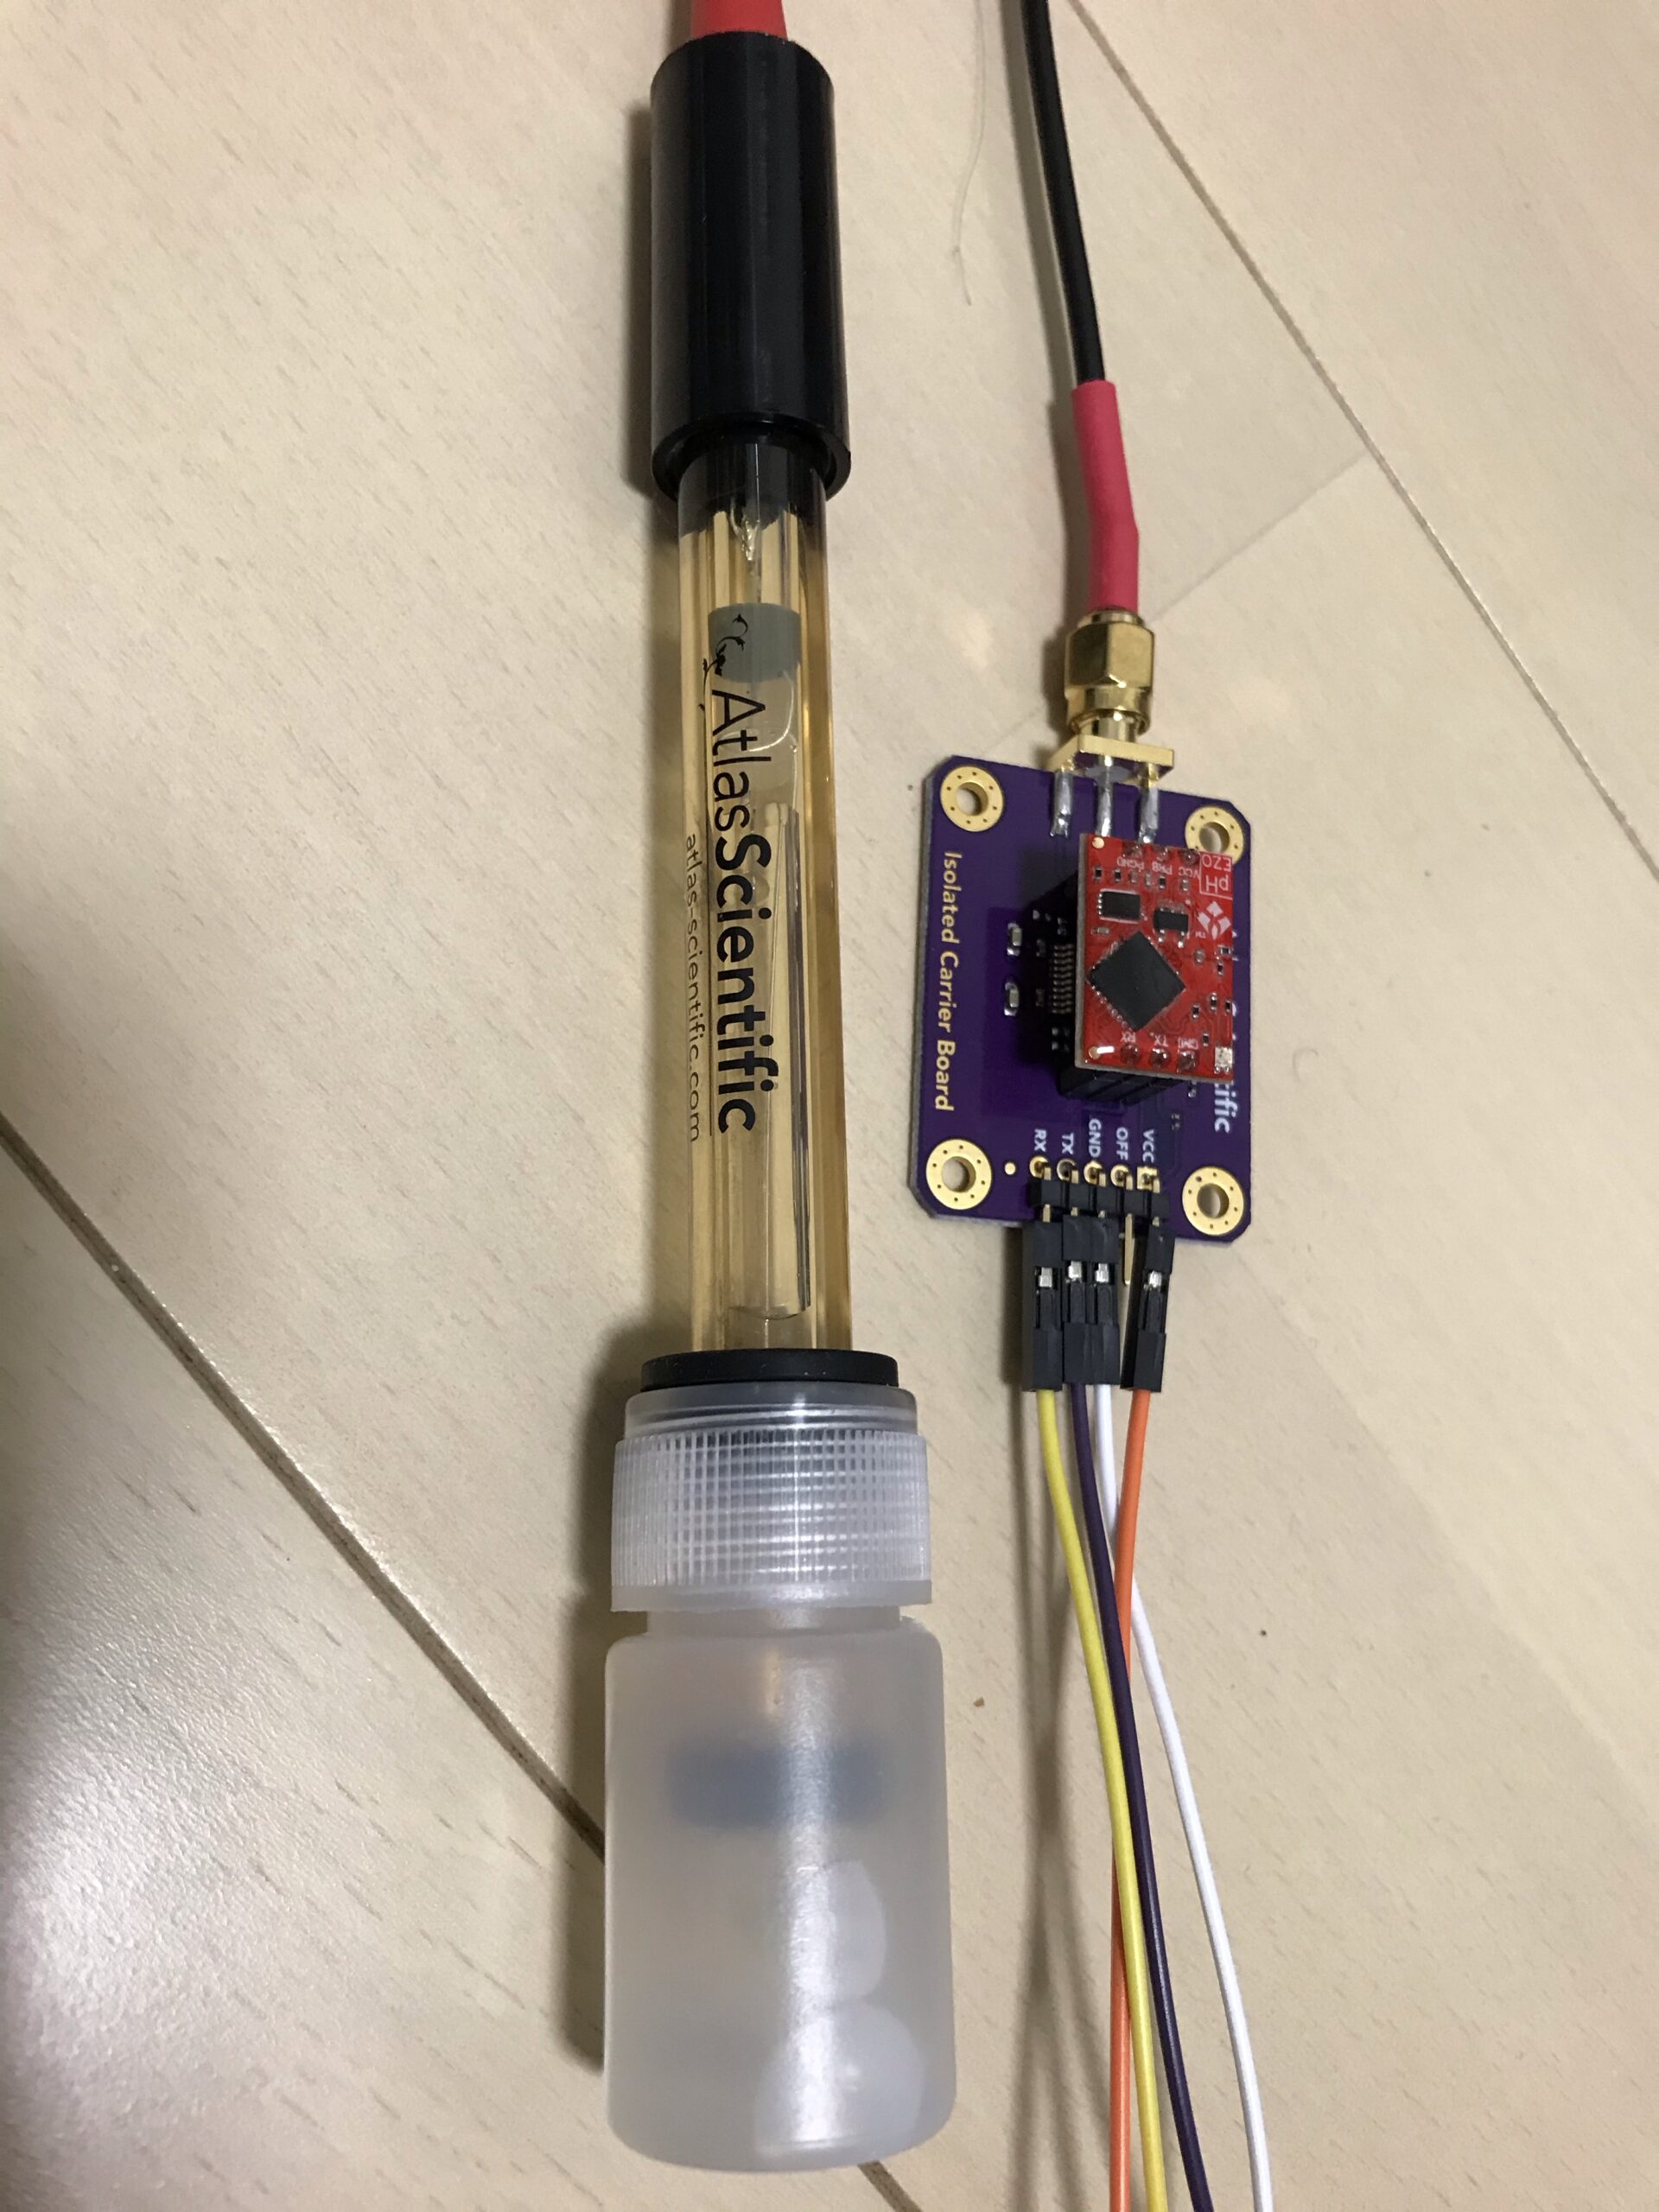
結線
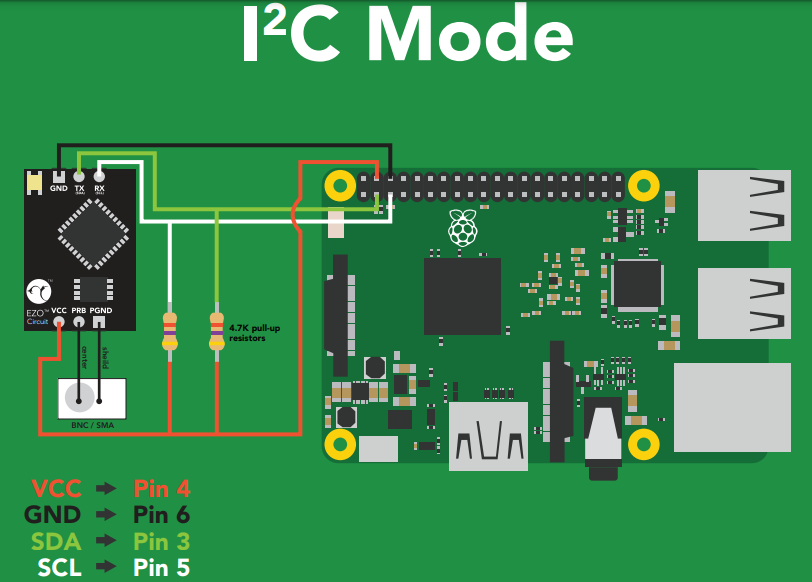
モード変更後の結線は以下となります。
| ラズパイ | pHセンサー |
| Pin2 or Pin4(5V) | VCC |
| Pin6(GND) | GND |
| Pin5(SCL) | RX(SCL) |
| Pin3(SDA) | TX(SDA) |
センサー、プローブを接続します。
pH測定
実際に測定していきます。
接続確認
i2cdetect コマンドを使用し、接続確認します。
 # sudo i2cdetect -y 1
     0  1  2  3  4  5  6  7  8  9  a  b  c  d  e  f
00:          -- -- -- -- -- -- -- -- -- -- -- -- --
10: -- -- -- -- -- -- -- -- -- -- -- -- -- -- -- --
20: -- -- -- -- -- -- -- -- -- -- -- -- -- -- -- --
30: -- -- -- -- -- -- -- -- -- -- -- -- -- -- -- --
40: -- -- -- -- -- -- -- -- -- -- -- -- -- -- -- --
50: -- -- -- -- -- -- -- -- -- -- -- -- -- -- -- --
60: -- -- -- 63 -- -- -- -- -- -- -- -- -- -- -- --
70: -- -- -- -- -- -- -- --
63が表示されれば接続OKです。
サンプルコード取得
ラズパイ向けのサンプルコードが提供されているため、任意のディレクトに移動し以下のコマンドを実行し、サンプルコードを取得します。
# git clone https://github.com/AtlasScientific/Raspberry-Pi-sample-code.git
サンプルコード実行
pythonコマンドからサンプルコードを実行します。
$ python i2c.py

>> Atlas Scientific I2C sample code
>> Any commands entered are passed to the default target device via I2C except:
  - Help
      brings up this menu
  - List
      lists the available I2C circuits.
      the --> indicates the target device that will receive individual commands
  - xxx:[command]
      sends the command to the device at I2C address xxx
      and sets future communications to that address
      Ex: "102:status" will send the command status to address 102
  - all:[command]
      sends the command to all devices
  - Poll[,x.xx]
      command continuously polls all devices
      the optional argument [,x.xx] lets you set a polling time
      where x.xx is greater than the minimum 1.50 second timeout.
      by default it will poll every 1.50 seconds
>> Pressing ctrl-c will stop the polling
>> Enter command:
試しにRコマンドでpHを取得します。
>> Enter command: R
Success 7.873
水槽のpH計ってみましたが、アルカリに傾いてますね。
センサーキャリブレーション
calコマンドを使用してキャリブレーションしていきます。
プローブの経年により誤差が発生するので、定期的なキャリブレーションが推奨されています。
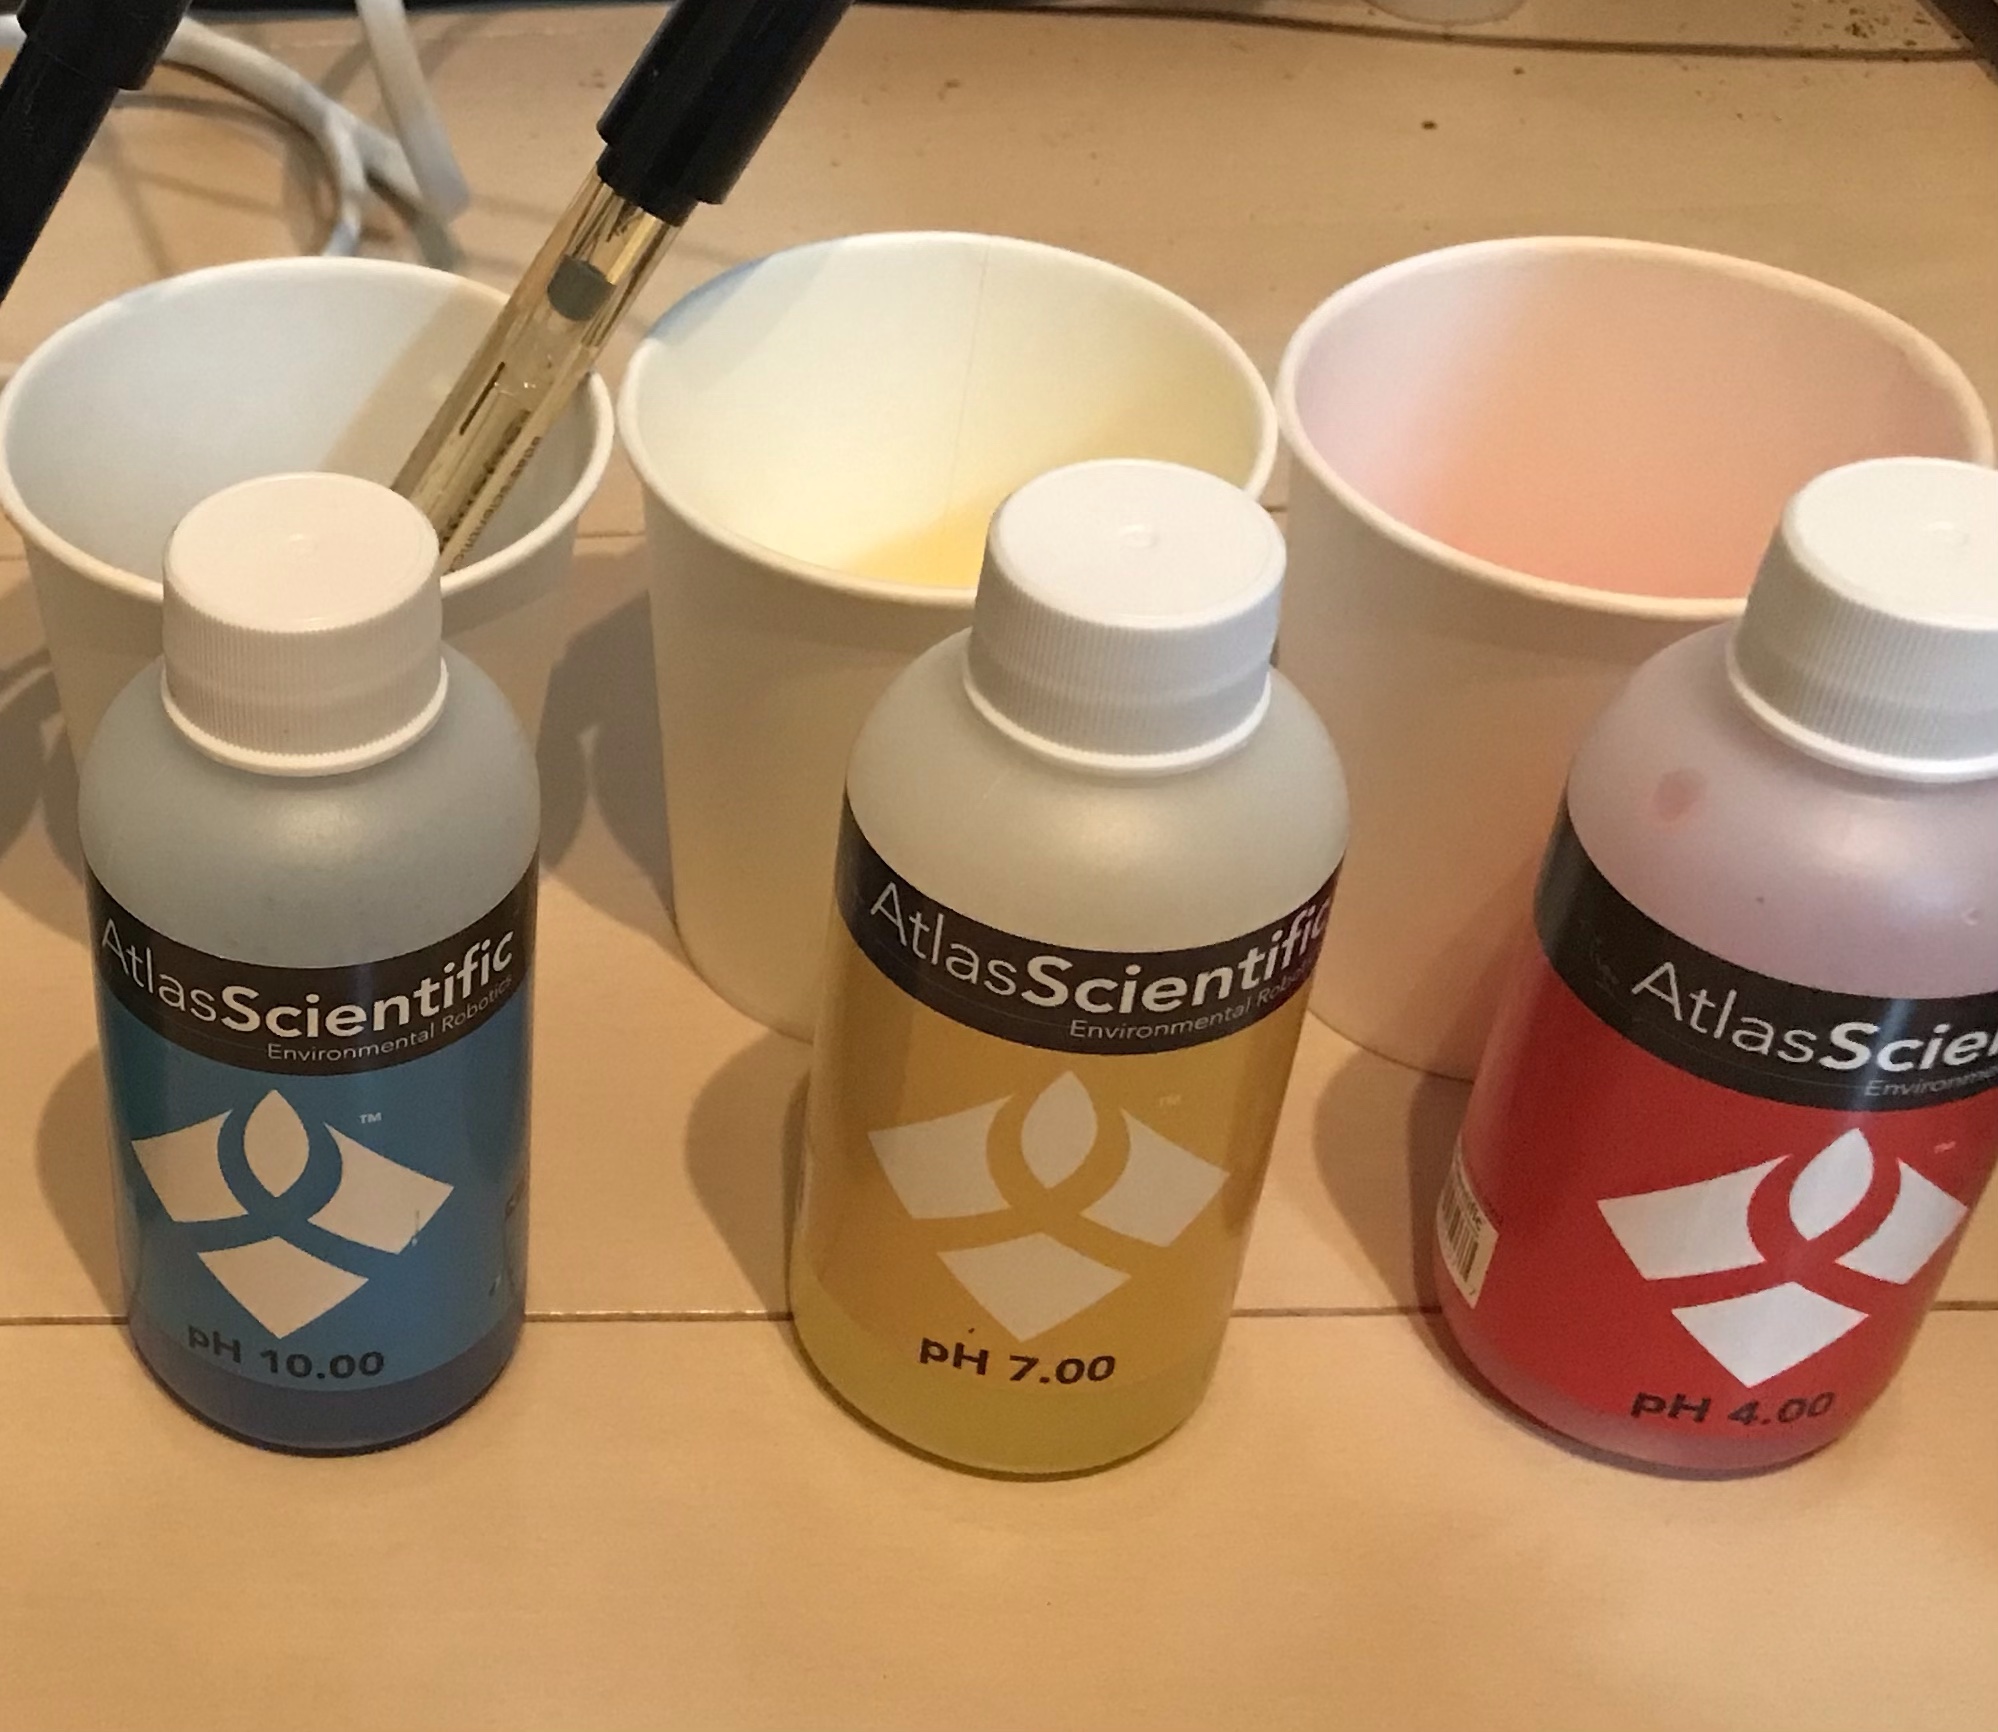
溶液があるので、溶液に付ける前にCal,clearして3点校正していきます。
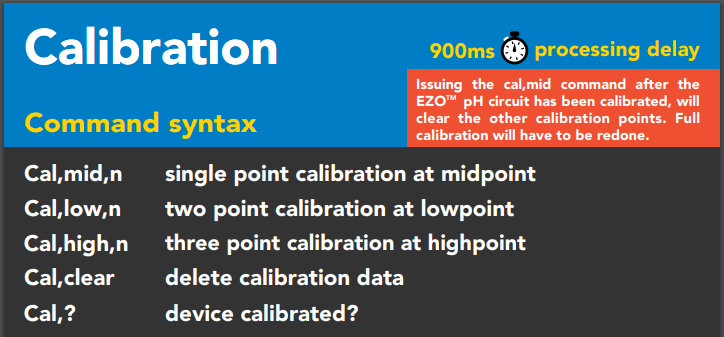
>> Enter command: Cal,low,4.00
Success
>> Enter command: Cal,mid,7.00
Success
>> Enter command: Cal,high,10.00
Success
>> Enter command: Cal,?
Success : ?CAL,3
上記で3点校正が完了しています。
今日はここまで。別途サンプルコードを活用した定期的な値取得をしていきます。


コメント